Uptime Kuma with Docker Compose

In this post I will give you a tutorial on how to set up Uptime Kuma with an already running Portainer & network setup with Nginx Proxy Manager.
Prerequisites:
- Docker and Docker Compose installed an running
- Nginx Proxy Manager installed and running
- Portainer installed and running
Step 1: Create directory and add Stack
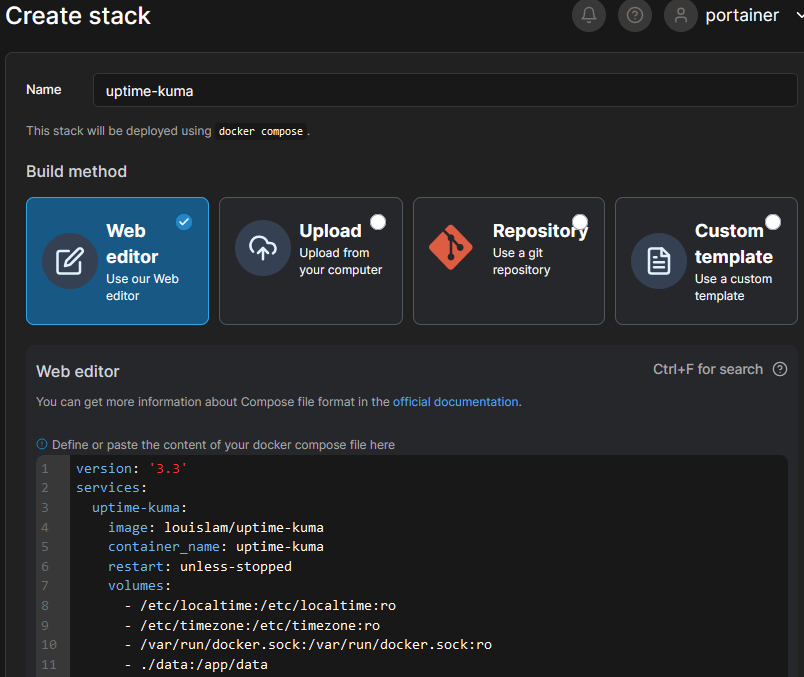
mkdir /opt/containers/uptimeOpen up your Portainer via browser and add a new Stack:

Create a new Stack:

Add the docker-compose.yml configuration:
version: '3.3'
services:
  uptime-kuma:
    image: louislam/uptime-kuma
    container_name: uptime-kuma
    restart: unless-stopped
    ports:
      - '3001:3001'
    volumes:
      - /etc/localtime:/etc/localtime:ro
      - /etc/timezone:/etc/timezone:ro
      - /var/run/docker.sock:/var/run/docker.sock:ro
      - ./data:/app/data
    networks:
      - npm-network #If not added with portainer already
networks:
  npm-network: #If not added with portainer already
    external: true #If not added with portainer already
Note: This docker-compose.yml file depends on your current system configuration. If you just want to deploy Uptime Kuma in a docker container just follow the offical Github on how to deploy the container. Example docker-compose.yml file.
If you are using NPM (Nginx Proxy Manager) and followed my project posts you are in the right spot.
Anyway, the docker-compose.yml file could not work for you in this case, because your networks may be different to mine. Furthermore the success of a working container depends on your portainer and/or network configuration itself.
Which means, you might have to change the networks for your specific environment. In my case, I use the npm-network network for the Proxy Manager connection for https with valid certificates. I explained this in this post for NPM and this post for Portainer.
As I said, this can be different to your environment!
Step 2: Deploy
- Deploy your Stack as mentioned above.
- Open the container uptime-kuma inside the stack
- Scroll to the bottom and add the npm-network

Step 3: Add domain to NPM
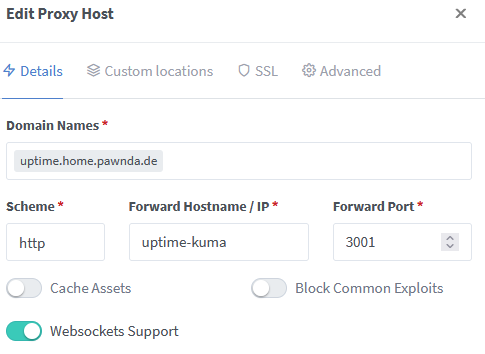
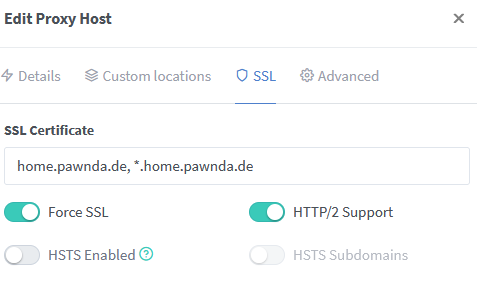
Access your NPM site and add a new proxy host:

Activate Websockets Support!

Save and you are good to go!
Since there are plenty tutorials on how to use Uptime Kuma i won't go into further explanation to this.
